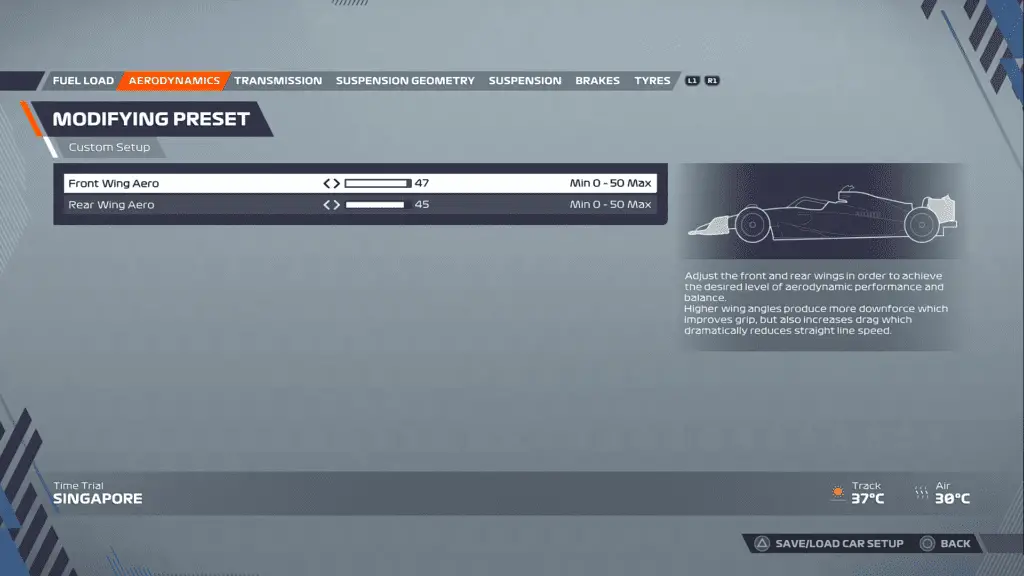
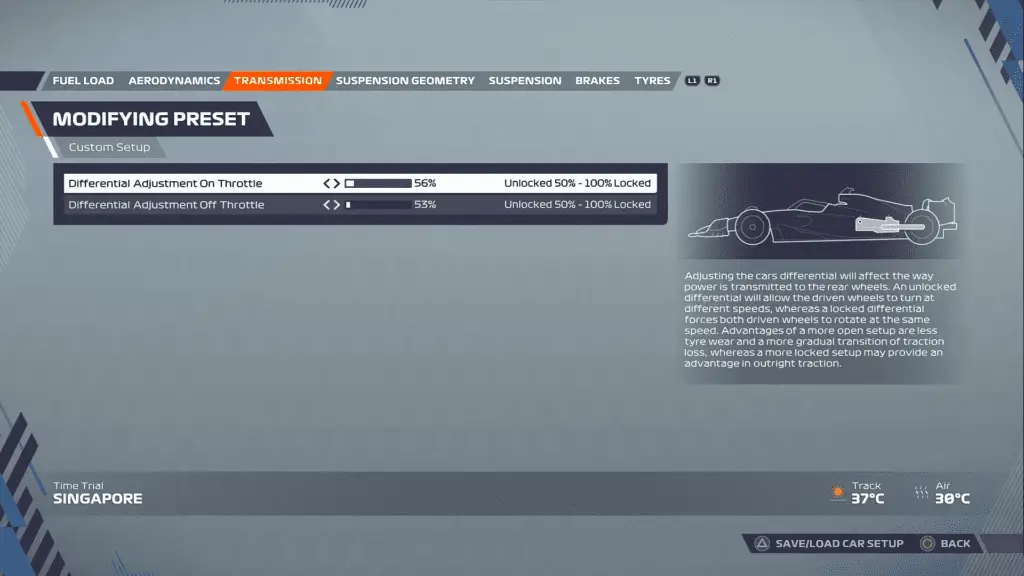
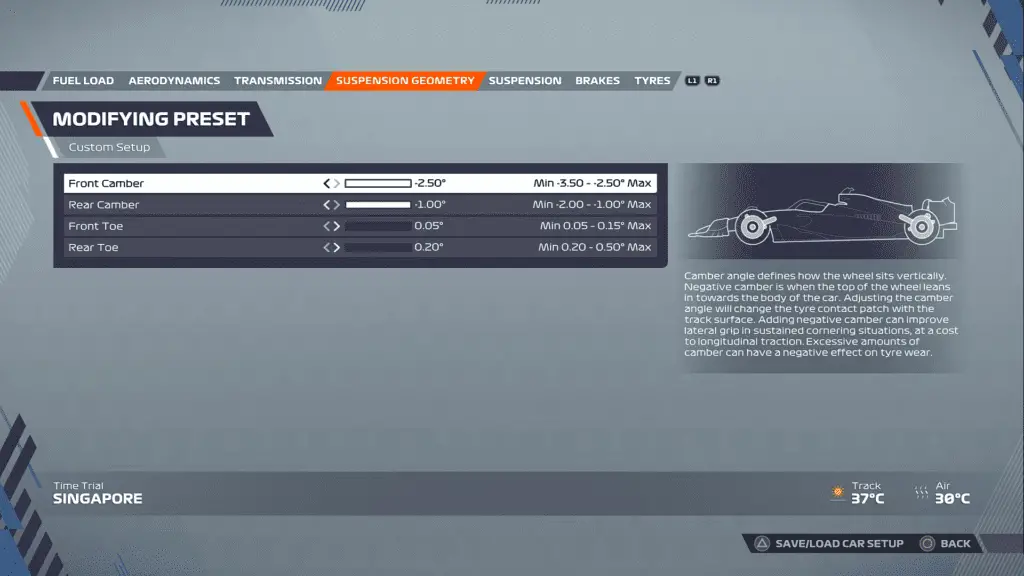
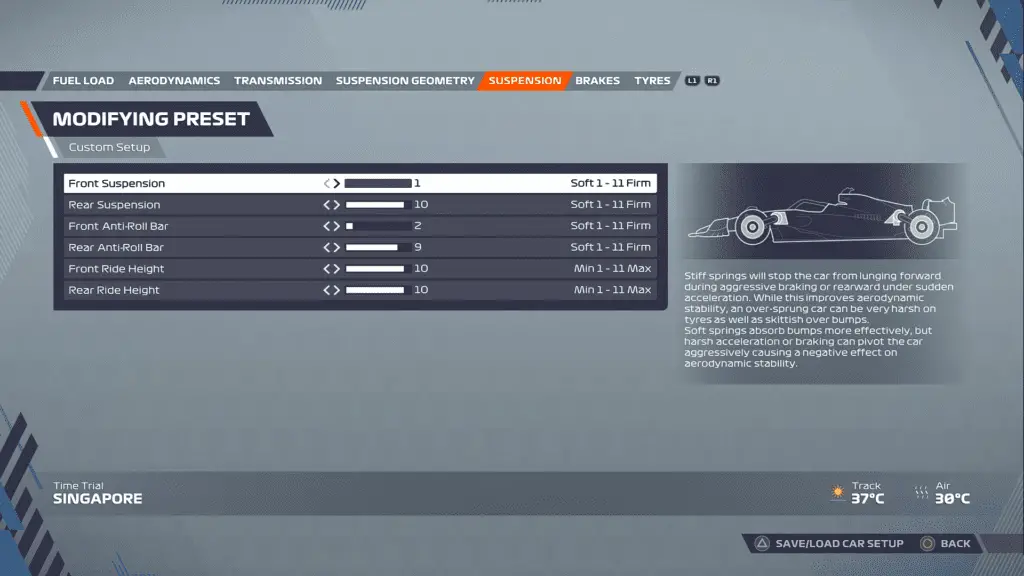
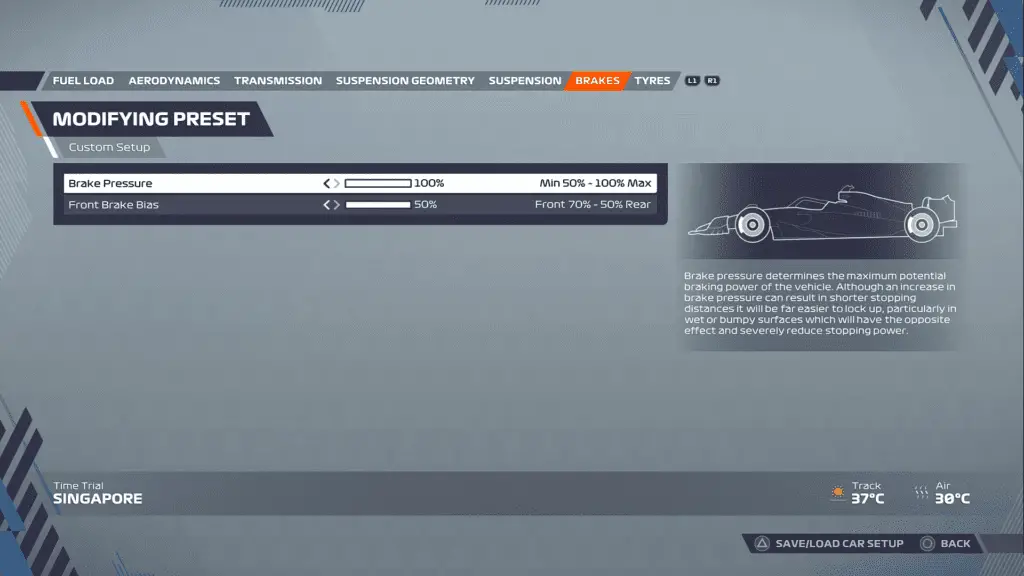
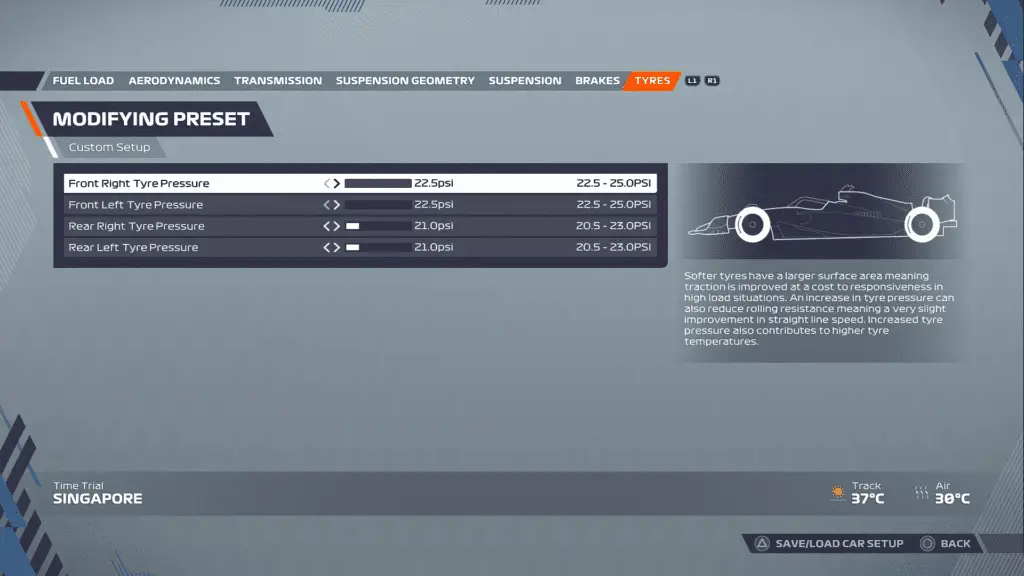
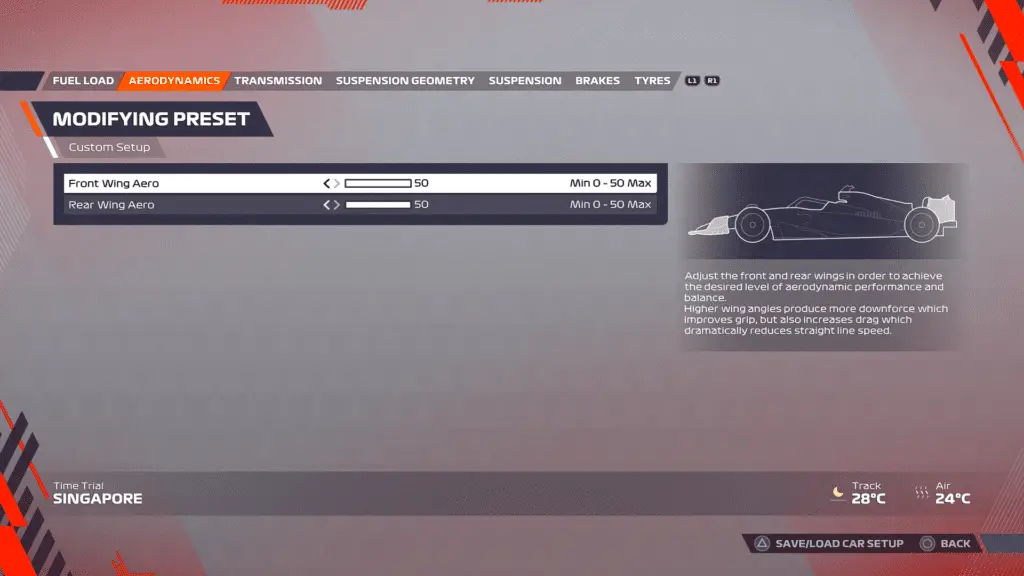
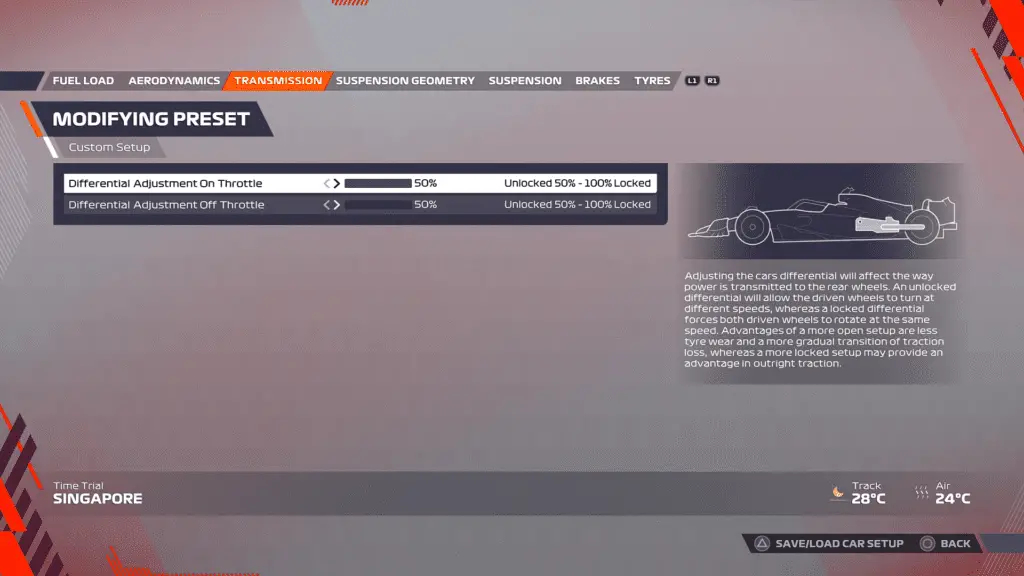
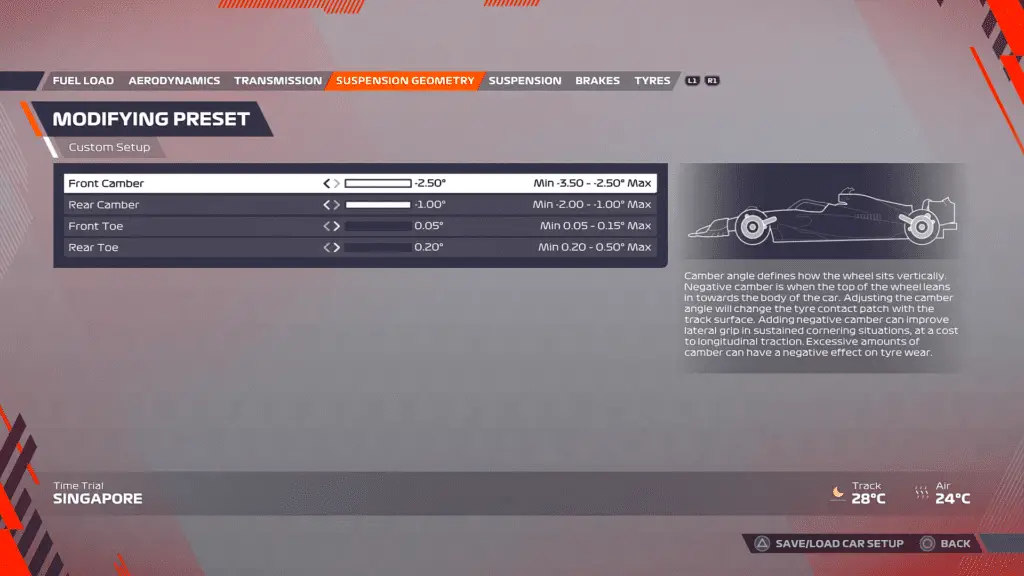
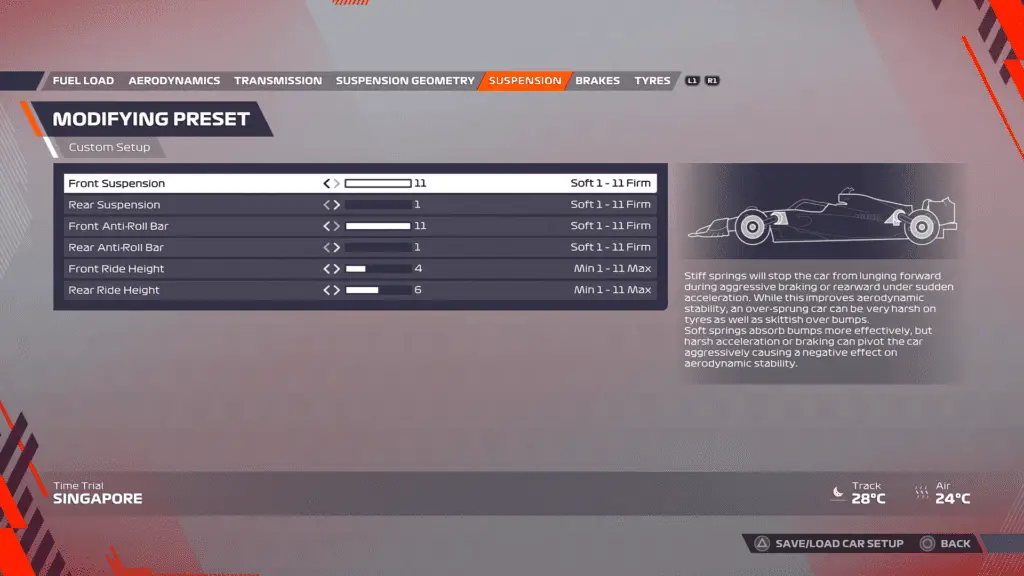
Singapore Setup


Can I run iRacing? Racing Sim PC Build Guide
This article contains affiliate links, which we may earn a small commission from, at no cost to you. As an Amazon Associate I earn from qualifying purchases.
With iRacing’s 2024 Season 1 now underway, we have put together a comprehensive guide for those interesting in the more serious challenge offered by this platform. If you are a Playstation or Xbox gamer, this guide will help you get started. IRacing is only available on PC, so you will need to make sure you have a system that is up to spec. However, this will open up more than just iRacing, with many other racing titles performing well on PC.
Recommended iRacing System Specs: Finding the Right Balance
Getting iRacing up and running smoothly doesn’t demand an extremely high-end PC. A solid choice for the processor would be something like an Intel Core i7-8700K – a reliable mid-level CPU that can handle the game well. As for the GPU, you don’t need to aim for the top shelf; a capable card like the RTX 2060 is more than sufficient. Regarding RAM, 16GB is a good baseline that can comfortably support your racing escapades. However, for an even smoother performance, especially for more intense gaming sessions, bumping up to 32GB of RAM could be a worthwhile upgrade.
What is the best PC for iRacing?
You can run iRacing on a huge number of gaming PC’s, and in 2023 you can even have a great experience with an older PC. iRacing is not as demanding as other games, and will be playable on almost any budget. Of course, you want to have the best experience possible, and we are here to help with that.
You have two main options, buy a pre-built PC that is plug and play, or buy the parts yourself and build a custom rig. Both have advantages, and both can deliver a very good iRacing experience!
Buying a Ready to Play Pre-Built PC
Buying a Ready to Play Pre-Built PC offers a hassle-free route into the realm of iRacing. These systems are designed with compatibility and performance in mind, ensuring that each component works well together to provide an optimal gaming experience. When opting for a pre-built setup, you benefit from the expertise of professionals who understand the demands of high-performance games like iRacing.
Pre-built PCs often come with a warranty, customer support, and sometimes even options for future upgrades. This peace of mind is invaluable, especially for those who may not be as tech-savvy or for racers who prefer to spend more time on the track than tinkering with hardware.
Manufacturers are aware of the requirements for popular games and tend to design their systems to exceed these specs, giving you not just what you need for today’s games, but also preparing you for upcoming titles. They frequently offer a range of systems tailored to different budgets, from entry-level models that can handle iRacing at acceptable frame rates to high-end machines that deliver ultra-settings with ease.
For those eager to dive into iRacing without the wait, a pre-built PC can be the perfect solution. It eliminates the guesswork of component selection and the potential frustrations of self-assembly. All you need to do is plug in, power up, and start your engines. With a ready-to-play pre-built PC, you’re not just buying a machine; you’re buying more time to enjoy the virtual race day atmosphere.
Best iRacing PC Pre-Built Options
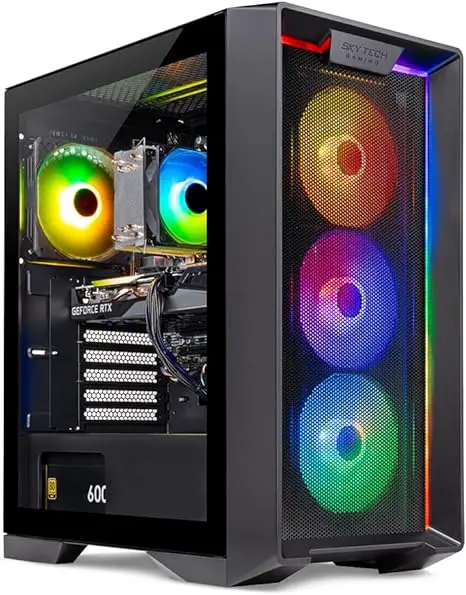
Skytech Gaming Nebula Gaming PC Desktop

MSI Aegis ZS Gaming Desktop, AMD Ryzen 7 7700, GeForce RTX 4060, 16GB RAM, 1TB SSD
CyberPowerPC Gamer Xtreme VR Gaming PC, Intel Core i9-13900KF 3.0GHz, GeForce RTX 4070 12GB, 16GB DDR5, 1TB NVMe SSD
Sponsored links
Building your own custom iRacing Gaming PC
Let’s start with the basics. You will need:
- A CPU, this will be the brains behind the PC, run the programs and carry out all of the complex calculations. This part could cost you from around $100/£100 for a budget (brand new) option, up to around $400/£400 for a high end option. You could even go super budget and pick up used parts for even cheaper (we will discuss this later)
- A GPU. The GPU is the Graphics Processing Unit, and will likely be the most expensive component of your build, and determines how well your visual experience will be. For sim focused racers, this is normally not the highest priority, but if you are planning on playing other titles, like Forza, F1 23, or even non-racing games (gasp!), then you may want to spend a little more here. For iRacing only, you can get some great budget pre-owned GPUs from around $150/£150, for general gaming some brand new entry-level GPUs from $350/£350, and the high-end GPUs could set you back over $1000/£1000, but should be capable for all games for years to come.
- RAM. RAM, or memory as it is often referred to, helps your PC handle the large game assets, and is one of the easiest parts to upgrade as you go along. Around 32gb of RAM (approx $60/£60) is a good place to start, but if you are really on a budget, starting with just 16gb is also an option (approx $35/£35).
- Other Parts: You will also need a motherboard, powersupply, and a case for your PC.
iRacing on a Laptop: A Seamless Experience?
Absolutely, you can embrace the thrills of iRacing on a laptop, provided it aligns with the game’s minimum or recommended specifications.
When assessing whether iRacing will perform on your current laptop or one you’re considering purchasing, scrutinizing the PC specs is crucial. For gaming laptops, meeting or exceeding the recommended specifications for iRacing is more crucial than ever. Upgradability is quite limited in laptops; most often, you’ll only be able to enhance the RAM. If the laptop falls short on other specs, you might have to search for a new contender.
Aim for a laptop boasting at least a 6-core i7 processor, coupled with a robust GPU—consider something in the ballpark of an RTX 3060 or better—and a minimum of 16GB of RAM for a start. Remember, in most laptops, the RAM might be the sole component you can upgrade down the line, so getting the GPU right from the get-go is pivotal.
For those on a budget, prioritize the GPU in your purchase, as this will significantly dictate your machine’s longevity and performance with iRacing and beyond.

Acer Nitro 5 AN515-58-525P Gaming Laptop |Core i5-12500H | NVIDIA GeForce RTX 3050 Laptop GPU | 15.6″ FHD 144Hz IPS Display | 8GB DDR4 | 512GB PCIe Gen 4 SSD

ASUS ROG Strix G16 (2023) Gaming Laptop, 16” 16:10 FHD 165Hz, GeForce RTX 4070, Intel Core i9-13980HX, 16GB DDR5, 1TB PCIe SSD
Sponsored links
iRacing System Minimum Requirements: Ensuring Smooth Performance
iRacing is known for being compatible with a range of PC setups, from older models to the latest rigs. For a satisfactory experience on basic settings, older PCs can suffice, but for higher graphics quality and better frame rates, a more current and powerful system is recommended.
CPU Requirements: iRacing lists a quad-core i5-4430 or an AMD Ryzen 3 1200 as the minimum required CPU, which is suitable for getting started. However, for a smoother experience with the ability to push higher settings, consider a CPU like an i7-10700K or an AMD Ryzen 7 5800X. These processors offer robust performance with higher core counts and faster clock speeds that will benefit your iRacing gameplay significantly.
GPU Requirements: While iRacing’s minimum GPU requirement is a card with at least 2GB of VRAM, you’ll want to aim higher for a consistent and reliable frame rate. For 2023, a great value used GPU would be something akin to an NVIDIA GTX 1660 Super or an AMD Radeon RX 6600 XT, or a brand new option could be a RTX 3060 (this will give you a great F1 23 experience too!) Both provide ample VRAM and are well-suited for iRacing, ensuring that you can enjoy a visually impressive and responsive racing experience.
If you’re on the hunt for a new PC to fuel your iRacing endeavors, you’ll find that many pre-built options come equipped with NVIDIA’s RTX series GPUs. Any card from this lineup, including the 20 series, is more than capable of giving you a smooth iRacing experience.
When it comes to RAM, 16GB is the base line to ensure your races don’t hit any performance snags. However, opting for 32GB of RAM is a savvy move for future-proofing your setup and handling more demanding tasks down the road.
In terms of storage, iRacing itself needs 25GB to get off the starting line, with the total going up to around 50GB if you’re planning to grab all the available content. To keep your PC running without a hitch, especially with updates and other applications in mind, targeting 50GB or more is a wise choice. This way, you’ll have ample room to grow your digital garage without worrying about storage space.
Below is a parts list for your own budget build. This is everything you will need, and this system will easily handle iRacing, as well as other gaming titles in 1080p resolution.
iRacing Budget PC Parts List
CPU: AMD Ryzen 5 5600X
6-core, 12-Thread. 4.6 GHz Max Boost, unlocked for overclocking, 35 MB of cache, DDR-3200 support
GPU: GIGABYTE GeForce RTX 3060
GIGABYTE GeForce RTX 3060 12GB 192-bit GDDR6
TEAMGROUP T-Force Vulcan Z DDR4 32GB Kit
(2x16GB) 3200MHz (PC4-25600) CL16 Desktop Memory Module Ram (Gray)

Lexar NS100 256GB 2.5
2.5” SATA III Internal SSD, Solid State Drive, Up To 520MB/s Read
ASUS Prime B450M-A II AMD AM4
3rd/2nd/1st Gen Ryzen Micro ATX Motherboard (128GB DDR4, 4400 O.C.), NVMe, HDMI 2.0b/DVI/D-Sub, USB 3.2 2, BIOS Flashback, and Aura Sync
Thermaltake SMART 600W ATX 12V V2.3
EPS 12V 80 Plus Certified Active PFC Power Supply
Antec NX410 ATX Mid-Tower Case
Tempered Glass Side Panel, Full Side View, Pre-Installed 2 x 140mm in Front & 1 x 120 mm ARGB Fans in Rear (White)
Sponsored links
Crafting the Optimal iRacing PC Setup for Peak Performance
For the dedicated sim racer who demands the pinnacle of performance, the ultimate iRacing PC setup is designed to push the limits of graphical excellence. This setup isn’t just about meeting the current standards but ensuring your system stands tall in the fast-evolving world of sim racing for years to come.
CPU: For the processing powerhouse, consider the Intel Core i9-10980XE, a formidable 12th-gen Intel i9 with a staggering 18 cores. It’s a titan that goes well beyond iRacing’s needs, allowing you to effortlessly juggle between gaming, multitasking, and editing those thrilling race replays.
GPU: Your visual experience will be driven by a top-tier RTX card. A GPU like the RTX 4070 Ti is a giant leap over iRacing’s minimum requirements and can handle the most graphically intense games with ease. With the release of the 4th series RTX cards, keep an eye out for potential deals on the 4070 ti.
RAM: A minimum of 32GB of RAM is where you start if high-end gaming is your goal, but why stop there? 64GB of RAM is the sweet spot to future-proof your setup, sidestep any potential memory bottlenecks, and it’s relatively economical compared to upgrading CPUs or GPUs.
Storage: iRacing itself is a lightweight contender, needing just 50GB for all its content. However, aim higher — an SSD to cut down on load times is a must, and shooting for well over 50GB of available space will ensure you’re set for any additional downloads without having to juggle files around later.
With this below setup, you’re not just ready to race; you’re ready to dominate the leaderboard while enjoying a seamless and immersive sim racing experience.
iRacing Recommended PC Parts List

AMD Ryzen 7 7800X3D
7800X3D 8-Core, 16-Thread Desktop Processor

GIGABYTE GeForce RTX 4070 Ti
3X WINDFORCE Fans, 12GB 192-bit GDDR6X
CORSAIR VENGEANCE DDR5 RAM 64GB
(2x32GB) 5200MHz CL40 Intel XMP iCUE
SABRENT 1TB Rocket
Nvme PCIe 4.0 M.2 2280 Internal SSD Maximum Performance Solid State Drive
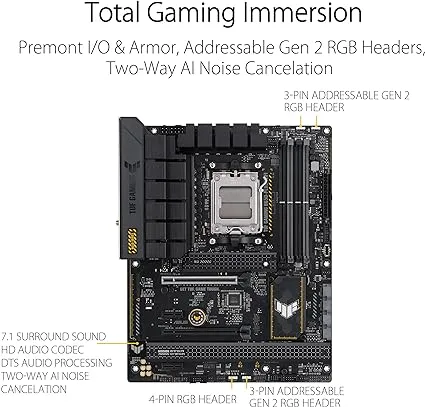
ASUS TUF Gaming B650-PLUS WiFi Socket AM5
Ryzen 7000 ATX Motherboard PCIe® 5.0 M.2 Support, DDR5 Memory, 2.5 Gb Ethernet, WiFi 6

Cooler Master MWE Gold 850W PSU
Full Modular, 850W, 80+ Gold Efficiency, 2 EPS Connectors, 120mm HDB Fan, Semi-fanless Operation, 5 Year Warranty
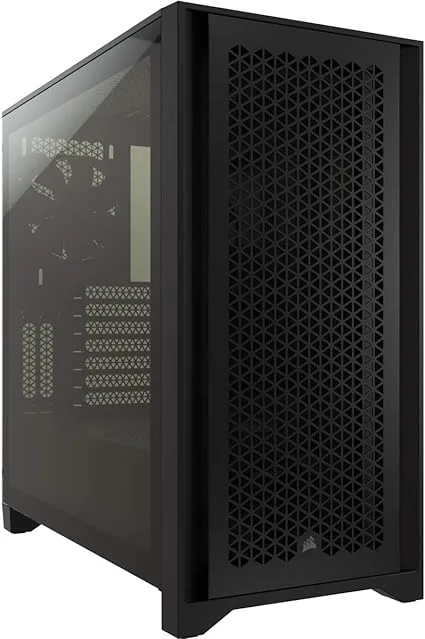
CORSAIR 4000D AIRFLOW
Tempered Glass Mid-Tower ATX Case – High-Airflow – Cable Management System – Spacious Interior – Two Included 120 mm Fans – Black
Sponsored links
